
This post explores the details of a tool I have previously released to aid Red Teamers and Pentesters in the infiltration and exfiltration of data from restricted remote desktop hosts, FlashExfil. We will explore the problem, the idea behind the solution, how to use the tool, and what defenders could do to prevent and detect this technique.
Remote Desktops and The Issue
Organisations use multiple types of Remote Desktops, such as internal RDP for servers and Virtual Desktop Infrastructure (VDI) for remote desktop use. I have explored a way attackers can attack classic RDP here. In this post, we are exploring a different issue attackers may face after having compromised a device via Remote Desktop.
As attackers we will often wish to infiltrate and exfiltrate data from these machines. However, organisations will often restrict VDIs such as disabling copy & paste to the host, or isolating them on the network level, especially when the VDI is used as a “Jump Box” or Bastion to secure networks, or has access to sensitive information. This can act as a blocker to attackers, making it hard to install their tooling, or retrieve their loot.
The Idea
This led to the idea: all VDIs and Remote Desktops, at minimum, must let the user view the screen, so we should try and encode our data onto the screen while recording and recover it from the recording. This led me to the idea of using a HTML file with the canvas API to draw a sequence of coloured squares, each colour encoding data of the original file. By recording this sequence, and decoding it on our machine, we could exfiltrate the data. This technique has various perks, including:
- Uses standard HTML and JavaScript present in most browsers
- Browsers are commonly used legitimately on VDIs so no suspicious process
- No need for any channel except the screen
For infiltration, our idea is quite simple, as long as it would be theoretically possible to type the data in, we can use an automated keyboard to type it. As our tooling for exfiltration is a HTML file, this is quite easy. The automated keyboard ensures we can type it in quickly and accurately.
Getting Files In
For this, we made use of the PyAutoGUI library, with our typer.py file. This script simply reads in the content of a selected file (chunking it if it is particularly large) then uses the write function of PyAutoGUI to type it via an emulated keyboard after a small delay (to allow focusing on the VDI). We can use this to deploy the HTML file for data extraction, or insert any other typable file we wish. Should we wish to insert a non-typable file, we could first base64 encode it, and type in a different HTML file which can decode it back from base64.
Getting Files Out
To get files out of a VDI using this tool, we use the flash.html file to encode the data on the target (using typer.py to write it in!), the collector.py to record it, and decode.py to decode the data back to the file.
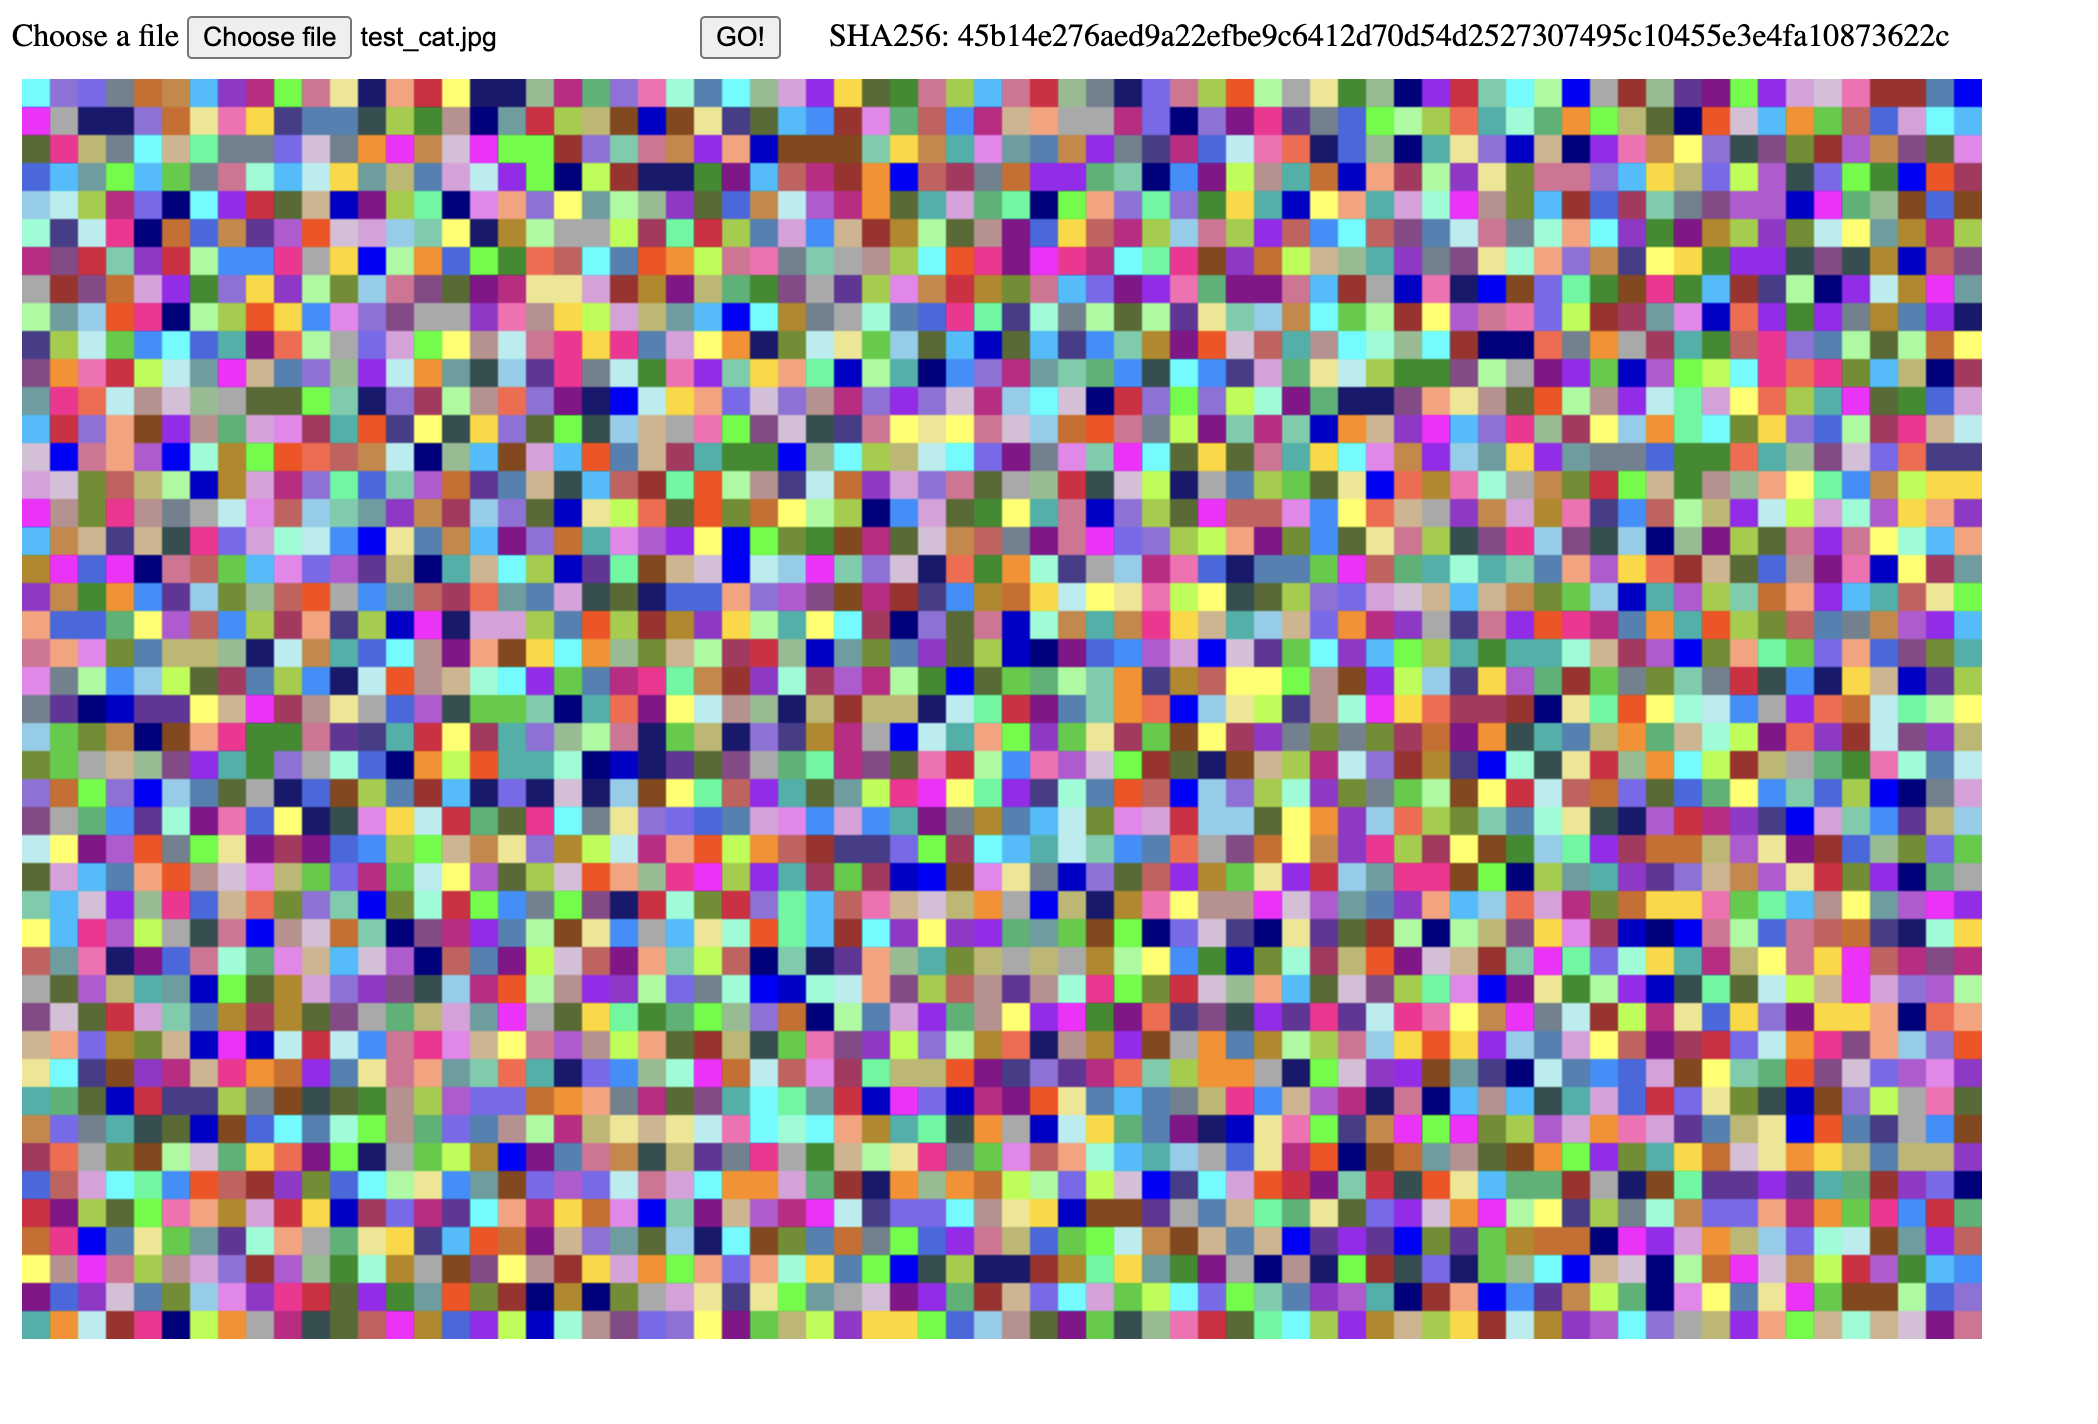
To extract the data, first we must encode it, this is the purpose of flash.html which will take a chosen file as input, and display a hash of the value (for later validation). It then converts it to base64 and with each base64 character allocated to a corresponding RGB value. The tool then computes a series of grids, with each grid cell being filled with the colour representing the next base64 value. By flashing these grids in order, it can display the full content of the file encoded.
By recording this sequence, we can then feed it into a decoder which will replay the recording frame-by-frame, and each time the grid changes, it will decode the data stored within it. By decoding each grid, the full base64 can be retrieved, and the original file recovered by decoding it back. We can then validate the file was extracted successfully by comparing the file hash of the decoded data, to that which was displayed by flash.html.
However, the underlying technology of Remote Desktop systems presents an issue, namely, that exact colours can be lost through the compression applied to the video stream. Therefore, if we tried to match the RGB value of every grid cell strictly against our expected values, the decoding may fail. We have to allow some variation. But this then leads to another issue, what if the variation allows some colour overlap, or mis-attributes a close value? This led us to our final solution for this tool.
Before we attempt to extract something new, on a new video stream, we first look to extract a known value, which uses every possible colour. By comparing what arrives with what we know was sent, we learn the colour each base64 character actually turns into on this connection, and decode future cells by matching them to the nearest learned colour. Importantly we should train per new connection, as the compression rate may vary, potentially rendering the training from one incorrect for another. My tool provides training.txt and training_b64.txt for this purpose, but you are welcome to configure your own.
This ultimately leads us to the following process to exfiltrate a file from a new connection:
- Write the
flash.htmlandtraining.txtfiles to the VDI viatyper.py - Load
flash.htmlin the VDI browser, and selecttraining.txtas the file - Using
collector.pystart recording the grid area, and start the flashing - Once the grids have all been displayed, stop the recording, and feed it into
decode.pyin training mode, this learns the colour each base64 character arrives as on this connection - Repeat steps 2, 3 and 4 with the file you wish to exfiltrate, using decode mode rather than training mode for
decode.py - Compare the hash shown in
flash.htmland the output ofdecode.pyto confirm successful exfiltration
FlashExfil
This tool can be found on my GitHub at FlashExfil A demo of the tool being used to exfiltrate an image (pre-trained, with a slow flash rate for demonstration) can be seen below:
Important Note: This demo video consists of a large quantity of flashing colours, do not watch this video if you are photosensitive
Prevent and Detect
The most obvious defence is to prevent this situation arising in the first place, by layering defence-in-depth, ensuring that malicious actors cannot access sensitive systems or access restricted material. Also ensure you have configured strong detection and audit logging at all layers, including when accessing material attackers may wish to exfiltrate, and combine these signals to raise alerts.
Prevention
This can be a difficult technique to prevent, as it is designed to use features of legitimate browsers. However, some examples of possible preventions are given below, which may be considered for suitability in your environment.
- For systems that don’t need browsers, use application control systems to prevent their execution
- Block loading of local HTML files (either entirely, or from unexpected directories)
- Disable file selection dialogs in the browser which stops
flash.htmlfrom loading the target file - Use screen capture protection if your VDI system supports it, such as Azure Virtual Desktop’s screen capture protection or Citrix App Protection (Although this wont prevent use of another device to record)
- Enable watermarking where supported, so any recording can be traced back to a user and session
- Limit the maximum colour depth of sessions reducing the number of distinct colours available
Detection
- Inhuman typing speed on a keyboard
- New HTML files written to user profiles on jump boxes or VDIs, especially when then opened in a browser from a local path
- Sensitive files being opened by a browser process
- Sustained high graphics bandwidth on an RDP session while little else on screen changes
- Flashing grids in session recordings, if you record privileged sessions